Cat toys provide entertainment and stimulation for your feline companions. Crochet offers a unique opportunity to create handmade toys for cats. Popular crochet patterns include crocheted mice, catnip-stuffed balls, and feathered teaser toys. These toys can be customized with different yarn colors and textures.
When crocheting cat toys, it’s important to use durable and washable materials, as well as cat-safe stuffing. Supervision is recommended during playtime to prevent any hazards. Crocheting cat toys allows for a creative outlet while providing cats with engaging and enjoyable play experiences.
Benefits of Free Crochet Patterns for Cat Toys
Crochet cat toys are safe and soft for your pet. They are also very affordable and can be personalized. Handmade toys can bring you and your cat closer together. Free crochet patterns for cat toys offer several benefits. They provide a cost-effective way to create personalized toys for your feline companion. Crocheting allows for customization in terms of colors, textures, and designs. DIY crochet projects are also a creative outlet and can be a source of satisfaction. Handmade cat toys can be unique and offer a sense of fulfillment while providing entertainment and mental stimulation for cats.
5 Free Crochet Patterns for Cat Toys for Fou
Here are some fun and easy projects for you to start with:- Crochet Mouse Toy
- Crochet Ball Toy
- Crochet Fish Toy
- Crochet Feather Toy
- Crochet Teaser Wand
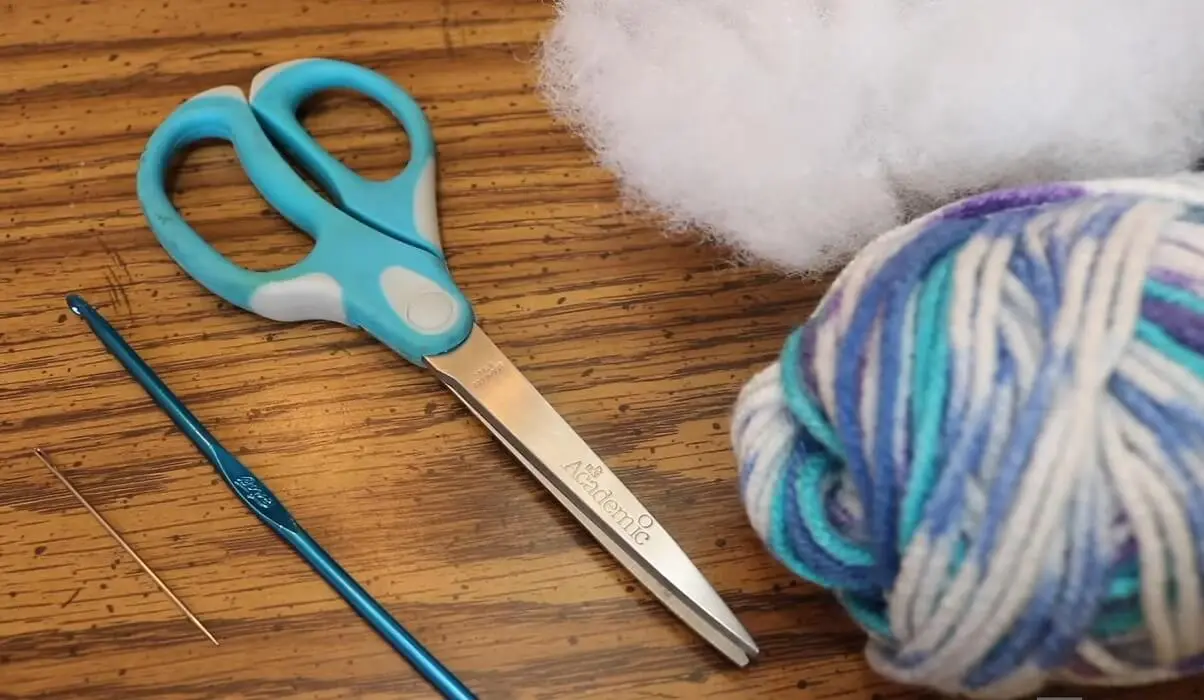
| Material | Description |
|---|---|
| Yarn | Soft, colorful, and cat-safe! |
| Crochet Hook | A size that’s right for your yarn. |
| Scissors | To cut the yarn when you need to. |
| Stuffing | To give shape to your toys. |
| Bell | For a toy that jingles. |
| Feathers | For a touch of realism. |
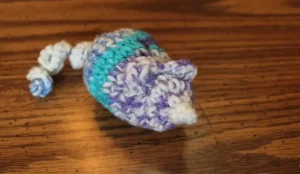
Crochet Mouse Toy
Gather your materials: You’ll need yarn in your choice of color, a crochet hook suitable for the yarn weight, a yarn needle, scissors, and stuffing material.
Start with the body: Begin by making a slipknot and chaining a few stitches to form a foundation row. Then, work single crochet stitches into each chain stitch to create a rectangular shape. Continue crocheting rows until you reach the desired length for the body, periodically counting your stitches to ensure consistency.
Shape the head and ears: To transition from the body to the head, decrease stitches gradually at one end of the row until you have a small, rounded shape for the head. To create ears, crochet small triangles on either side of the head by working a few rows of single crochet stitches, gradually decreasing at the top corners.
Add details: Embroider eyes and a nose onto the head using a yarn needle and contrasting yarn. You can also sew on small felt pieces or use safety eyes if preferred.
Stuff and close: Fill the body and head of the mouse with stuffing material, making sure to shape it to your desired fullness. Once stuffed, close the openings by sewing the edges together using the yarn needle and yarn, ensuring the stuffing remains securely inside.
Create a tail: To make the tail, chain a length of stitches, leaving a long enough tail at the end. Attach the tail to the back of the mouse using the yarn needle.
Finishing touches: Trim any excess yarn and weave in loose ends to give the toy a neat appearance.
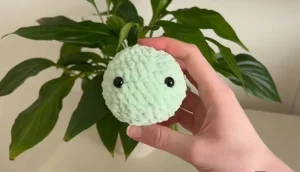
Crochet Ball Toy
To make a crochet ball toy, you can follow these simple steps:
Gather your materials: You’ll need yarn in your preferred color, a crochet hook suitable for the yarn weight, scissors, and stuffing material (optional).
Begin with a magic ring: Make a magic ring by wrapping the yarn around your fingers, inserting the hook through the ring, and pulling up a loop. Then, chain one to secure the ring.
Crochet the first round: Work a set number of single crochet stitches into the magic ring. The number of stitches will depend on the size of the ball you want to create. For example, you might start with six single crochet stitches for a small ball.
Increase stitches: In each subsequent round, work two single crochet stitches into each stitch of the previous round. This will gradually increase the circumference of the ball. Continue increasing until the ball reaches the desired size.
Stuff the ball (optional): If you want a stuffed ball, insert stuffing material into the opening of the ball as you crochet. Make sure to evenly distribute the stuffing to create a round shape.
Decrease stitches: Once the ball has reached the desired size, begin decreasing stitches to close the opening. Work single crochet stitches together, combining two stitches into one, in each round until the opening is nearly closed.
Finish and secure: Cut the yarn, leaving a long tail. Thread the tail through a yarn needle and weave it through the remaining stitches, pulling tight to close the opening. Secure the yarn and trim any excess.
You now have a crochet ball toy! Feel free to experiment with different yarn colors, textures, and stitch patterns to create unique variations of the ball toy.

Crochet Fish Toy
Gather your materials: You’ll need yarn in your choice of color(s), a crochet hook suitable for the yarn weight, scissors, a yarn needle, and stuffing material.
Start with the body: Begin by making a slipknot and chaining a few stitches to form a foundation row. Then, work single crochet stitches into the foundation chain to create a rectangular shape. Continue crocheting rows until you reach the desired length for the body, periodically counting your stitches to ensure consistency.
Shape the tail: To create the fish’s tail, decrease stitches gradually at the end of each row until you have a triangular shape. This will give the body a tapering effect towards the tail.
Add fins: Crochet additional pieces for the fins. For the side fins, make small rectangular shapes and attach them to the sides of the body. For the dorsal fin, create a small triangular shape and attach it to the top of the body.
Embellish the body: Embroider eyes and a mouth onto the body using a yarn needle and contrasting yarn. You can also add additional details like stripes or scales using different colors or surface crochet techniques.
Stuff and close: Fill the body of the fish with stuffing material, shaping it to your desired fullness. Once stuffed, close the opening by sewing the edges together using the yarn needle and yarn, ensuring the stuffing remains securely inside.
Finishing touches: Trim any excess yarn and weave in loose ends to give the toy a neat appearance.
You also can customize your crochet fish toy by experimenting with different yarn colors, adding embellishments, or adjusting the size and shape of the fins to suit your preferences. Let your creativity swim free!
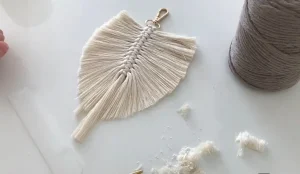
Crochet Feather Toy
To make a crochet feather toy, you can follow these steps:
Gather your materials: You’ll need yarn in your preferred color(s), a crochet hook suitable for the yarn weight, scissors, and a yarn needle.
Create the feather shape: Start by making a slipknot and chaining a few stitches to form a foundation chain. Then, work a row of double crochet stitches into the foundation chain. The number of stitches will depend on the size and width you want for your feather.
Shape the feather: To give the feather its distinctive shape, you’ll work decreases at the end of each row. Decrease stitches by crocheting two stitches together at the end of each row until you have a pointed feather shape.
Add decorative details: You can add decorative elements to your feather by crocheting chains in contrasting colors or attaching small beads or feathers to the edge. Get creative and customize it to your liking.
Finish the feather: Once you’re satisfied with the shape and appearance of the feather, cut the yarn, leaving a long tail. Thread the tail through a yarn needle and weave it through the stitches to secure the end.
Create multiple feathers: Repeat steps 2-5 to make additional feathers. You can make feathers in different colors or sizes to add variety to your toy.
Assemble the toy: Once you have multiple feathers, you can tie or attach them together at the top using a piece of yarn. You can also attach them to a small crochet ball or other base to create a dangling toy.
You can experiment with different yarn colors, stitch patterns, and embellishments to create unique and personalized crochet feather toys. Have fun and let your creativity take flight!
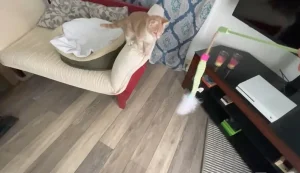
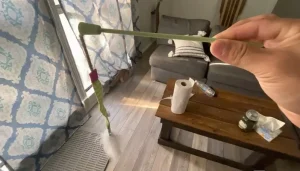
Crochet Teaser Wand
To make a crochet teaser wand, Follow these steps:
Gather your materials: You’ll need yarn in your preferred color(s), a crochet hook suitable for the yarn weight, a wooden dowel or stick, a small bell or jingle ball, scissors, and a yarn needle.
Crochet the toy attachment: Start by crocheting a small stuffed toy or shape of your choice. This can be a simple ball, a heart, or any other design you prefer. Use basic crochet stitches, such as single crochet or double crochet, to create the shape. Leave a long tail at the end to attach it to the wand.
Stuff the toy (optional): If you want a stuffed toy, insert stuffing material into the opening of the crochet piece. Make sure to evenly distribute the stuffing to create a well-shaped toy.
Attach a bell or jingle ball: Sew a small bell or jingle ball securely to the inside of the stuffed toy using the yarn needle and yarn. This will provide an enticing sound when the toy is moved.
Attach the toy to the wand: Take the long tail from the crochet toy and thread it through the yarn needle. Insert the needle through the top of the wooden dowel or stick and then back through the toy, creating a secure connection. Repeat this process a few times to ensure the toy is firmly attached to the wand.
Secure and trim: Tie a knot with the yarn tail around the dowel or stick to secure the attachment. Trim any excess yarn.
Optional embellishments: If desired, you can further decorate the wand by attaching ribbons, feathers, or other lightweight materials to the top of the wand. Make sure these embellishments are securely fastened.
Your crochet teaser wand is now ready to use! Wave it gently in front of your cat to engage their hunting instincts and provide interactive playtime. Always supervise your cat while playing with the wand to ensure they don’t accidentally ingest any small parts or yarn.
Here are More Free Crochet Patterns for Cat Toys for Beginners
Here are a few free crochet patterns for cat toys that are beginner-friendly:
“Simple Crochet Cat Toy” by Yarnspirations: This pattern features a basic ball shape using single crochet stitches. It’s a quick and easy project that provides hours of entertainment for your furry friend.
“Easy Crochet Mouse Toy” by Crochet Spot: This pattern guides you through creating a cute mouse toy using basic stitches. It includes step-by-step instructions and photos for easy reference.
“Crochet Fish Cat Toy” by Craftbits: This pattern uses simple stitches to create a fish shape. It’s a great introduction to shaping and can be customized with different colors and embellishments.
Remember to always supervise your cat during playtime and ensure the toys are safe and securely crafted.

Some Tips for customization and personalization
When it comes to customizing and personalizing free crochet patterns for cat toys, here are some tips to consider:
Yarn Colors: Play with different colors of yarn to create unique and eye-catching designs. You can use solid colors, variegated yarn, or even create stripes or color blocks within the pattern.
Embellishments: Add extra flair to your cat toys by attaching ribbons, bows, or small bells. These embellishments can make the toys more visually interesting and engaging for your cat.
Size Modifications: Adjust the size of the pattern to suit your preferences or your cat’s preferences. You can make the toys larger or smaller by using thicker or thinner yarn and adjusting your crochet hook size accordingly.
Texture Experimentation: Try different types of yarn or stitch patterns to create varied textures. Cats often enjoy toys with different textures, so you can incorporate bumpy or fuzzy yarn, or use stitch patterns like popcorn stitches or raised stitches to add texture to the toys.
Stuffing Alternatives: Instead of traditional stuffing material, you can try stuffing the toys with catnip or adding a small pouch of dried lavender or other cat-friendly herbs. This can make the toys more appealing and provide additional sensory stimulation for your cat.
Shape and Design Variations: Feel free to modify the shape of the toys to fit your cat’s interests. You can make different animal shapes like birds or fish, or even experiment with abstract shapes or geometric designs.
Remember to consider your cat’s safety while customizing the toys. Avoid using small parts or materials that can be easily chewed or swallowed. Always supervise your cat while playing with crochet toys to ensure they are used safely.
Safety Precautions When Using Homemade Toys
When using homemade cat toys, it’s important to prioritize safety for your furry friend. Here are some safety precautions to keep in mind:
Quality Materials: Ensure that the yarn and materials you use are safe for cats. Avoid using yarns with small fibers that can be easily chewed off and swallowed. Opt for non-toxic and durable materials.
Avoid Small Parts: Do not include small parts, buttons, or anything that can be easily detached from the toy as they may pose a choking hazard. Cats can be curious and may try to chew or swallow small objects.
Secure Attachments: Make sure that any attachments, such as bells or ribbons, are securely fastened to the toy. Regularly inspect the toys for loose parts or damage that could be hazardous.
Supervision: Always supervise your cat during playtime with homemade toys. Monitor their behavior and check for any signs of damage or wear that may require immediate replacement.
Size Considerations: Ensure that the toys are an appropriate size for your cat. Avoid making toys that are too small, as they can be swallowed accidentally.
Cleanliness: Regularly clean and wash the toys to maintain hygiene. Cats may drool on toys or carry them around, so it’s important to keep them clean to prevent the growth of bacteria or mold.
Individual Cat’s Needs: Consider your cat’s specific needs and preferences. Some cats may prefer softer toys, while others may enjoy toys with a bit of texture. Observe your cat’s behavior and adjust the toys accordingly.
By following these safety precautions, you can create and use homemade cat toys that provide both enjoyment and peace of mind for you and your feline companion.
Final Thoughts
Crochet cat toys are a great way to show love to your pet. They are easy and low-cost. Plus, they are special because you made them!
Frequently Asked Questions For Free Crochet Patterns For Cat Toys: Delight & Captivate!
What Are Easy Crochet Cat Toy Patterns?
Free crochet patterns for cat toys often include simple designs like balls, mice, and interactive toys. Ideal for beginners, these patterns provide step-by-step guidance for creating fun toys with minimal skill requirements.
Are Crochet Toys Safe for Cats?
Crochet cat toys, when made with pet-safe yarns and without small detachable parts, are generally safe for cats. Always supervise your pet during play to ensure their safety.
Can I Find Crochet Cat Toy Patterns For Free?
Absolutely! Numerous online resources are offering free crochet patterns for cat toys, ranging from beginner-friendly designs to more advanced projects for seasoned crafters.
What Materials Do I Need For Crocheting Cat Toys?
To start crocheting cat toys, you need yarn, a crochet hook, stuffing, and a yarn needle. Opt for durable, washable yarns to create long-lasting toys for your feline friends.